The Paint Starts Flowing! The Basics...
Time has come and we're painting! I won't bore you with the assembly and priming basics, as there really isn't much new to learn and the instructions included are sufficient to get started. I will add a little bit of info about our prep first though...I use Vallejo Grey Primer and an airbrush to start all my models out.
Why Grey? It's been my experience that white is a poor covering surface, and always tends to shine its way through the tiniest little gap if you miss a spot. Black, on the other hand, mutes translucent colors and requires several coats to cover a surface you want opaque. I NEVER use black as a primer. Grey is a perfect mid-tone and promotes bright warm colors, and deep cool hues. Trust me on this one, I've primed with all three and Grey produces the best result.
Okay, now lets throw some base color down over our primer. For my color pallet I've chosen the following for our base coat and highlights.

Using an airbrush and a paint to water ratio of 2 drops color to 1 drop water, I cover the exposed fur and add low tones using Charred Brown. Then I apply Beasty Brown at a 45 degree angle to add a high tone to suggest the influence of light.
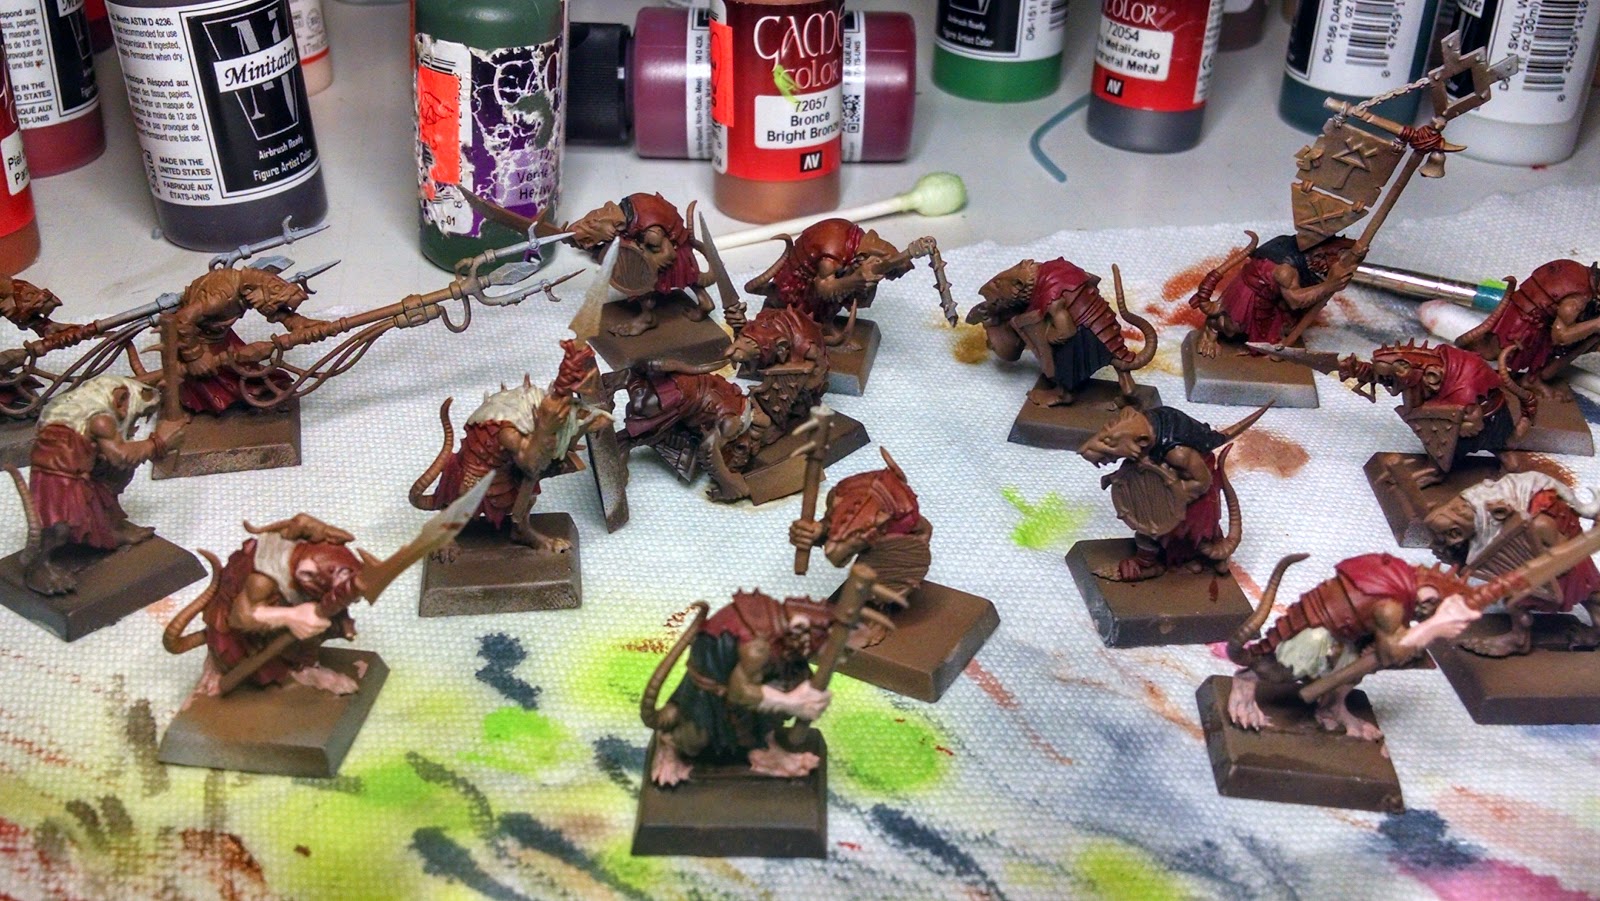
Next we block in some base colors for our clan. I decided to use Gory Red, Bone White and Black as the cloth colors, I used Elftone for the flesh, and Shadow Grey for the highlighting of the black. (Painter's note here: Black has to be highlighted in order to register as black. Otherwise it will never look right and just register as a void of dark color on your model.)

Here is an example:

Additionally, I decided to use as few metallic colors on this army as I can get away with. They are, after all, supposed to be vermin and have lack-luster equipment. A ton of Clan Rats all decked out in chain mail and adorned in shinny silver helms is something I frown on and is best left to the Pointy Eared Things. I used a color called Parasite Brown to cover the areas I want to represent as Leather Armor, and example of which is the head and neck piece of the Clan Rat above.
Next it's time to tint (Ink) and Wash our model. I used the Army Painter Soft Shade for the wash, and an Ink called 'Skin Wash' to tint the leather armor areas. Don't wash the areas you've tinted, or you'll erase your detail in this step. We'll cover it with a wash later. Here is an example.

The tinted leather areas take on a very rustic look when the ink is applied. If you are detailing a single model and want more detail, try using a cotton ball to dab the ink while it's wet to add patches of worn areas. As I am painting a Horde Army, I have elected to keep this very very basic and not try to make each of the 150 Clan Rats a masterpiece. I just don't have the patience or time for that.
Next, (After the wash and ink have dried) we use our Shadow Gray and add some highlights to the Black areas. Additionally, Blood Red was added to highlight some of the red areas, using a very basic dry-brush technique. (Painter's Tip: Although most artists say rub most of the paint off the brush prior to applying the dry-brush technique, I find that a moist tip allows for a more even transfer of paint and gets rid of the 'Chalky' appearance most dry-brush methods leave behind. I remove just enough paint so I don't leave globs and apply with a very light touch.)

Now then, it's time to...Ugh...add some metallic. I use 'Gun Metal' and do so sparingly since it tends to get all over the place, even when using the utmost care! God, I hate them, but I don't want to have to shade non-metallic colors on 150 models, sooooo...we cheat! Also, I've found the impact more dramatic when we use an opaque non-metallic color to highlight, and we also ensure that highlight has a touch of blue in it. Why blue? Well, I've found when you want silver to appear 'as sliver', that a little blue added into the highlight works well. By using Wolf Grey, which already has blue in it, we achieve our goal without having to mix our own. Besides, it really is a beautiful color. (All you Space Wolf fans probably agree!)

They highlight is applied to the very edges of flat silver surfaces, and to the raised and/or lowest portion of exposed armor. This gives the illusion of light dancing around the model and creates depth. We also use a very fine brush to add a touch of Blood Red, mixed 1/1 with our Elf Flesh, to create the highlight dot for the eye. That same brush (I use a 0/10 round) is dabbed back into straight Elf Flesh to highlight the raised areas of skin on the model's face, hands, feet and tail.
Time to highlight the shield! The wood was highlighted with Parasite Brown mixed with Bone White, at a 3/1 ratio of Brown to White. Three separate passes were made, each touching a smaller area then the last with a slightly brighter mix of Brown to White..from 3/1 to 2/1 then finally, 1/1 on the final pass.

We're not going to worry about the metal parts of the weapons until later, since I have something cool in mind. We're going to be using our airbrush to add some glowing green effects to each of them, which sounds tedious, but is in reality very quick and very easy.
Well, back to the painting table for now. I'll add an update when we've gotten our Clan Rats ready for some weapon paint and basing! Until Then,
Casey.
Why Grey? It's been my experience that white is a poor covering surface, and always tends to shine its way through the tiniest little gap if you miss a spot. Black, on the other hand, mutes translucent colors and requires several coats to cover a surface you want opaque. I NEVER use black as a primer. Grey is a perfect mid-tone and promotes bright warm colors, and deep cool hues. Trust me on this one, I've primed with all three and Grey produces the best result.
Okay, now lets throw some base color down over our primer. For my color pallet I've chosen the following for our base coat and highlights.
Using an airbrush and a paint to water ratio of 2 drops color to 1 drop water, I cover the exposed fur and add low tones using Charred Brown. Then I apply Beasty Brown at a 45 degree angle to add a high tone to suggest the influence of light.
 |
| Charred Brown undercoat with a Monster Brown highlight. |
Next we block in some base colors for our clan. I decided to use Gory Red, Bone White and Black as the cloth colors, I used Elftone for the flesh, and Shadow Grey for the highlighting of the black. (Painter's note here: Black has to be highlighted in order to register as black. Otherwise it will never look right and just register as a void of dark color on your model.)
Here is an example:
Additionally, I decided to use as few metallic colors on this army as I can get away with. They are, after all, supposed to be vermin and have lack-luster equipment. A ton of Clan Rats all decked out in chain mail and adorned in shinny silver helms is something I frown on and is best left to the Pointy Eared Things. I used a color called Parasite Brown to cover the areas I want to represent as Leather Armor, and example of which is the head and neck piece of the Clan Rat above.
Next it's time to tint (Ink) and Wash our model. I used the Army Painter Soft Shade for the wash, and an Ink called 'Skin Wash' to tint the leather armor areas. Don't wash the areas you've tinted, or you'll erase your detail in this step. We'll cover it with a wash later. Here is an example.
The tinted leather areas take on a very rustic look when the ink is applied. If you are detailing a single model and want more detail, try using a cotton ball to dab the ink while it's wet to add patches of worn areas. As I am painting a Horde Army, I have elected to keep this very very basic and not try to make each of the 150 Clan Rats a masterpiece. I just don't have the patience or time for that.
Next, (After the wash and ink have dried) we use our Shadow Gray and add some highlights to the Black areas. Additionally, Blood Red was added to highlight some of the red areas, using a very basic dry-brush technique. (Painter's Tip: Although most artists say rub most of the paint off the brush prior to applying the dry-brush technique, I find that a moist tip allows for a more even transfer of paint and gets rid of the 'Chalky' appearance most dry-brush methods leave behind. I remove just enough paint so I don't leave globs and apply with a very light touch.)
Now then, it's time to...Ugh...add some metallic. I use 'Gun Metal' and do so sparingly since it tends to get all over the place, even when using the utmost care! God, I hate them, but I don't want to have to shade non-metallic colors on 150 models, sooooo...we cheat! Also, I've found the impact more dramatic when we use an opaque non-metallic color to highlight, and we also ensure that highlight has a touch of blue in it. Why blue? Well, I've found when you want silver to appear 'as sliver', that a little blue added into the highlight works well. By using Wolf Grey, which already has blue in it, we achieve our goal without having to mix our own. Besides, it really is a beautiful color. (All you Space Wolf fans probably agree!)
They highlight is applied to the very edges of flat silver surfaces, and to the raised and/or lowest portion of exposed armor. This gives the illusion of light dancing around the model and creates depth. We also use a very fine brush to add a touch of Blood Red, mixed 1/1 with our Elf Flesh, to create the highlight dot for the eye. That same brush (I use a 0/10 round) is dabbed back into straight Elf Flesh to highlight the raised areas of skin on the model's face, hands, feet and tail.
Time to highlight the shield! The wood was highlighted with Parasite Brown mixed with Bone White, at a 3/1 ratio of Brown to White. Three separate passes were made, each touching a smaller area then the last with a slightly brighter mix of Brown to White..from 3/1 to 2/1 then finally, 1/1 on the final pass.
We're not going to worry about the metal parts of the weapons until later, since I have something cool in mind. We're going to be using our airbrush to add some glowing green effects to each of them, which sounds tedious, but is in reality very quick and very easy.
Well, back to the painting table for now. I'll add an update when we've gotten our Clan Rats ready for some weapon paint and basing! Until Then,
Casey.

Comments
Post a Comment
Please be respectful and no abusive language.