Big Rats on Steroids - AKA Rat Ogres
Time to put some paint onto the big guys of the army; yes, I'm talking about our giant sized Rat Ogre monsters! (Well, Monstrous Infantry anyway) We are done with the 1500 point army phase of the league, and the next threshold will be 2k games. So, we have to add 500 points to our current list. One of the ways we're doing this is to increase our Rat Ogre unit size from 3 models, to 5 models. So, without further doudling, lets get to work.
We previously based coated three of our ogres with Vallejo 'Charred Brown' and 'Monster Brown' highlights. I decided to base the other two a little differently, so here's how it was done.
I first primed the new models using Vallejo Grey Primer, (Airbrush) and then added 'Raven Black' (Badger) to the shadow areas, like under the arms, creases between muscles, and areas hidden from the light by positioning of other pieces of the model.

I then applied a base coast of 'Rotten Wood' (Badger) over the entire model, making sure not to over spray the areas with the freshly added black, so the shadow areas would remain darker then the surrounding areas. Next, I applied a mix of 'Angel Blood' and 'Ecchymose' (Badger) to areas I wanted to tint purple, like under the arms, medium recesses, etc. A highlight of 'Rugged Skin' (Badger) was applied to the high areas, and allowed to dip into some of the purple shade, just to blend the edges.
On the models we previously based, I started at the 'Purple' step, and continued to the highlight portion in the same manner described.
 Now, since we have two different color applications here, we're going to have fun with it. We'll do one set using a basic 'base color, wash, highlight' process, and the other we'll get fancy, adding a tint to our highlight, skipping the wash, and instead brush shading our shadows, and finally, no dry brushing what so ever.
Stay tuned for the next batch of pics, which should be available in a couple days.
*UPDATE*
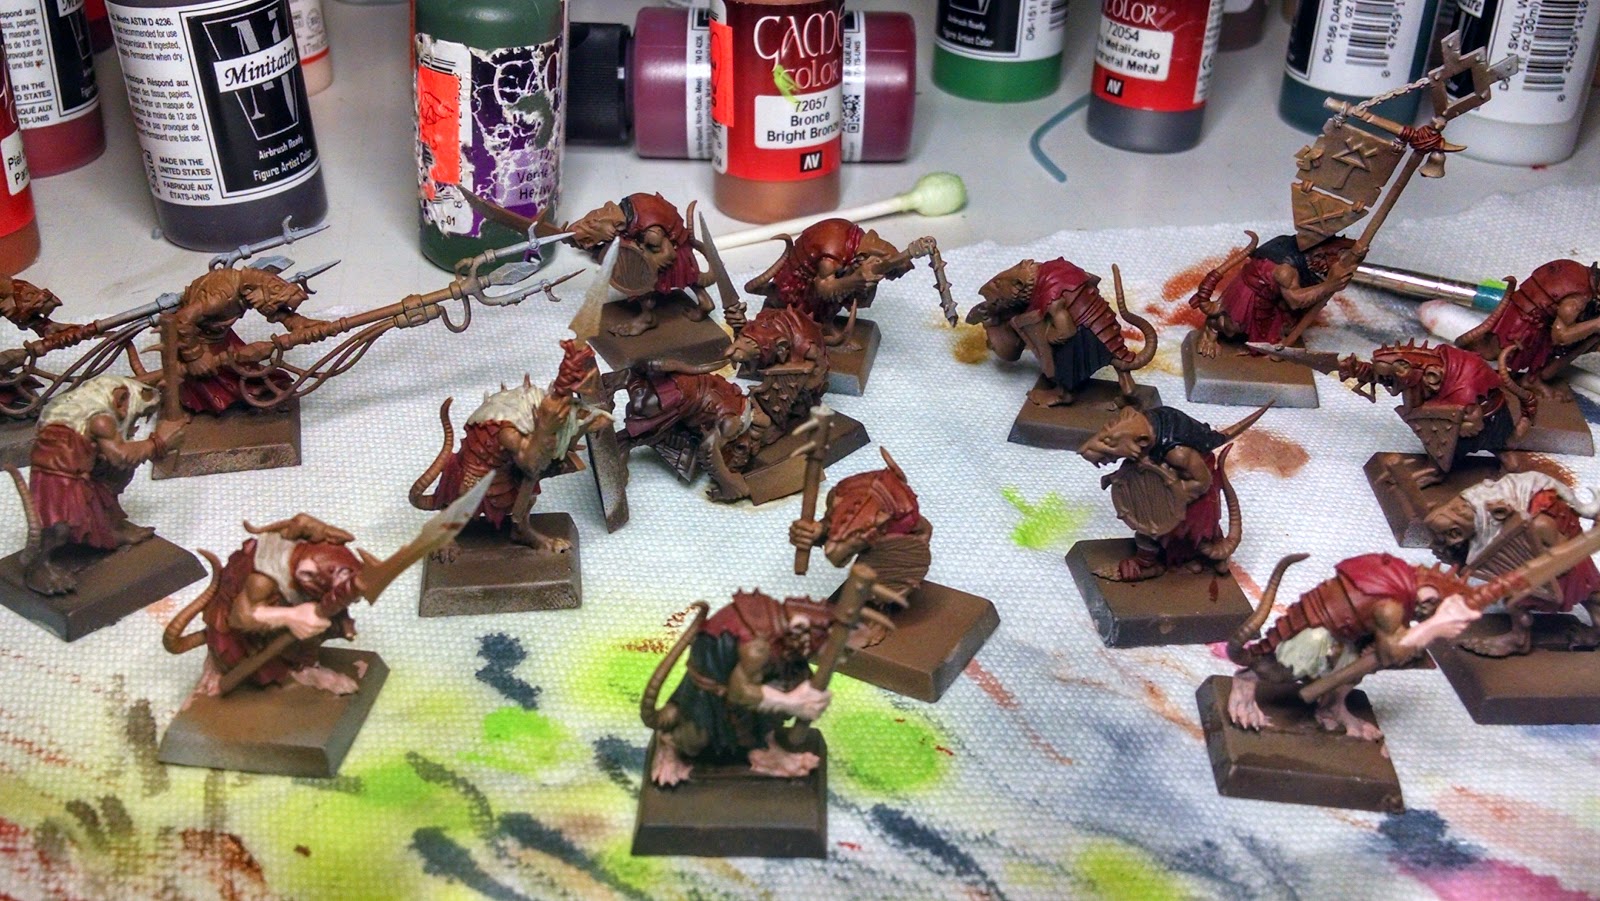
Didn't get a chance to finish these guys up yet, but we progressed a little. So far we based in the basic colors we're going to use and are preparing for a wash. Gory Red for the loin cloth, Dark Green for the Warp Stone, Black for the hoses and toe/finger nails and fur, Gun Metal for the silver parts, Charred Brown for the belts and leather, Uniform Gray (The only Army Painter paint used) and lastly, Brass mixed with Dark Green (All Vallejo colors BTW) for our tinted copper.

*UPDATE*
Here we've washed our models with 'Soft Tone' from Army Painter. The first application was a little light, so a 2nd wash was required. Here are two of the models, the one on the right was originally base coated with browns, the one on the left was primed and shaded.


Some follow-up highlighting was done using 'Pale Flesh' (Vallejo) and 'Elf Flesh' (P3), which were applied to only high areas and sections I thought were too dark from washing.
*UPDATE*
Finished one day later than I expected, but such is life. Here are two of the finished models, both of them having been primed with the 'lighter' version of our base colors, which I ended up liking much better! Anyway, the only real detail that is new for these is the addition of some Patina on the Brass and Metal parts. Instead of walking you through how I did it here, I'll dedicate a whole posting to the process.
Enjoy!


Until next time,
Casey
We previously based coated three of our ogres with Vallejo 'Charred Brown' and 'Monster Brown' highlights. I decided to base the other two a little differently, so here's how it was done.
I first primed the new models using Vallejo Grey Primer, (Airbrush) and then added 'Raven Black' (Badger) to the shadow areas, like under the arms, creases between muscles, and areas hidden from the light by positioning of other pieces of the model.
I then applied a base coast of 'Rotten Wood' (Badger) over the entire model, making sure not to over spray the areas with the freshly added black, so the shadow areas would remain darker then the surrounding areas. Next, I applied a mix of 'Angel Blood' and 'Ecchymose' (Badger) to areas I wanted to tint purple, like under the arms, medium recesses, etc. A highlight of 'Rugged Skin' (Badger) was applied to the high areas, and allowed to dip into some of the purple shade, just to blend the edges.
On the models we previously based, I started at the 'Purple' step, and continued to the highlight portion in the same manner described.
Stay tuned for the next batch of pics, which should be available in a couple days.
*UPDATE*
Didn't get a chance to finish these guys up yet, but we progressed a little. So far we based in the basic colors we're going to use and are preparing for a wash. Gory Red for the loin cloth, Dark Green for the Warp Stone, Black for the hoses and toe/finger nails and fur, Gun Metal for the silver parts, Charred Brown for the belts and leather, Uniform Gray (The only Army Painter paint used) and lastly, Brass mixed with Dark Green (All Vallejo colors BTW) for our tinted copper.
*UPDATE*
Here we've washed our models with 'Soft Tone' from Army Painter. The first application was a little light, so a 2nd wash was required. Here are two of the models, the one on the right was originally base coated with browns, the one on the left was primed and shaded.
Some follow-up highlighting was done using 'Pale Flesh' (Vallejo) and 'Elf Flesh' (P3), which were applied to only high areas and sections I thought were too dark from washing.
*UPDATE*
Finished one day later than I expected, but such is life. Here are two of the finished models, both of them having been primed with the 'lighter' version of our base colors, which I ended up liking much better! Anyway, the only real detail that is new for these is the addition of some Patina on the Brass and Metal parts. Instead of walking you through how I did it here, I'll dedicate a whole posting to the process.
Enjoy!
Until next time,
Casey

Comments
Post a Comment
Please be respectful and no abusive language.