Here at the DeVry Institute, our Engineers study...
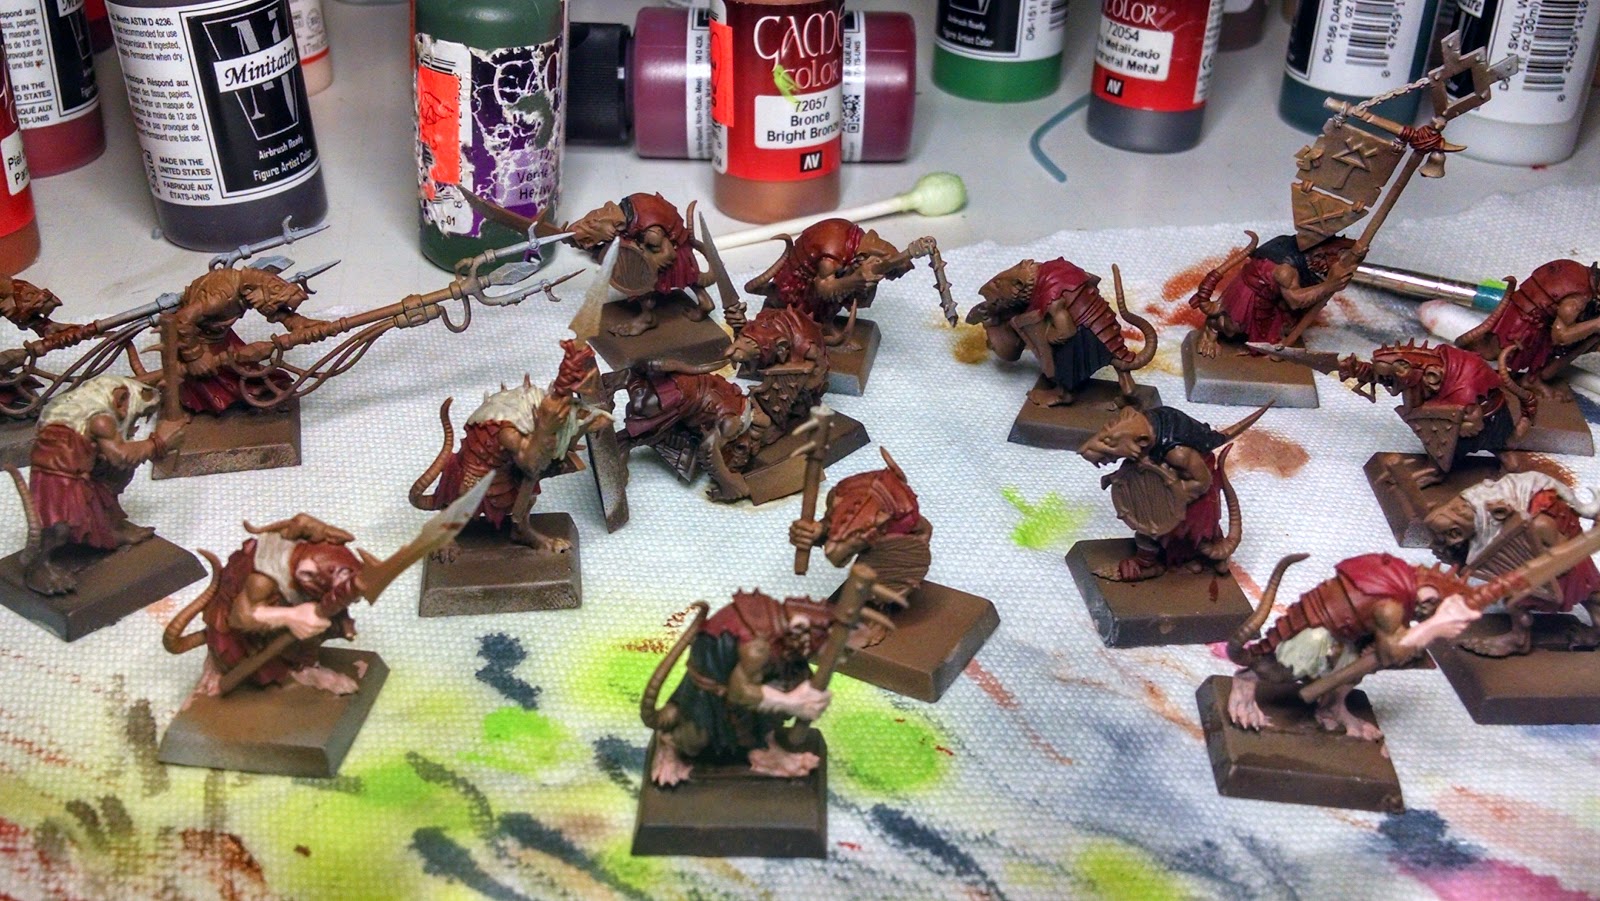
...WARP LIGHTNING BABY! We begin our Engineer Painting with a practical exercise in Highlight first vs. Shadow First painting techniques. So, what am I talking about? During our first base coat application I'm going to apply strictly base coat and highlights to one model (Referred to here after as our 'Light' model), and then base coat and shadows on the other (The Dark model).
I mainly wanted to see which was faster and required less skill with the airbrush. So, to that end we start! The Light model was based with 'Tree Bark', from the Badger airbrush line, and lightened with 'Saddle Brown', also from Badger. Then a highlight of 'Skeletal White' was applied to the high areas. Note: We didn't care too much about the highlight spilling over into the shadow areas, since these will be defined later with washing. Also, we're going for a smooth color blend and trying to create some areas to catch the eye.
The Dark model is done in the reverse. We base using the same 'Tree Bark' color, but then add some 'Angel Blood' to the transition. We then accentuate the shadow areas with a 'Raven Black', from Badger, to define our darkest areas.

The remainder of the base colors are brush painted onto the models. Vallejo 'Gun Metal' for the silver, 'Bright Brass' mixed with 'Charred Brown', to create a copper color for the backpack and various weapon accents, Black for the hoses, 'Blood Red' for the gem, 'Parasite Brown' for the musket stock, and P3 'Elf Flesh' for the exposed skin.

Next we wash the model. 'Soft Shade' for the skin, Black for the silver areas, and 'Dark Shade' for the brass. We also used the soft shade on the Light model's robes to start defining our shadow areas. The clothing on the Dark model was left unwashed.

Now we define our highlight areas on the Dark model by adding 'Blood Red' to the raised area of clothing we want the eye to catch. Our typical green highlights were also added to the hoses, backpack and handheld halberd type weapon. The flesh tone on the model was highlighted using a mix (1/1) of 'Elf Flesh' and Vallejo 'Pale Flesh'.


Now I'm not entirely happy with these, especially the red one, but we're in a time crunch so they'll have to do. If I was taking more time I would have built up the reds on the Dark model to present more of a transition. I noticed that most of the subtle transitioning I did with the base colors was covered up by applying the highlights to the red, and what remains of the transitions aren't visible to the camera, though appear when looking at the model in hand. Something I'll stick in my memory bank for later jobs.
All in all it was much faster to paint the Light model, since the wash was applied for the shadows and that was that. The Dark model required more patience and ended with a less than desirable effect, at least in my opinion. Again, committing more time to the process would fix that, but we're forging forward and have a ton more painting to do.
This also brings up the answer to the question, 'Why do you try new things?' Well, the reason we all do I guess, to learn. It's really all just an exercise in refining technique anyway, so why not play a little to have some fun. We ended up with a decent looking model and we learned something to apply to our next attempts. Never be afraid to experiment, 'Simple Green' is cheep and will fix most your mistakes haha.
Until next time,
Casey.
I mainly wanted to see which was faster and required less skill with the airbrush. So, to that end we start! The Light model was based with 'Tree Bark', from the Badger airbrush line, and lightened with 'Saddle Brown', also from Badger. Then a highlight of 'Skeletal White' was applied to the high areas. Note: We didn't care too much about the highlight spilling over into the shadow areas, since these will be defined later with washing. Also, we're going for a smooth color blend and trying to create some areas to catch the eye.
The Dark model is done in the reverse. We base using the same 'Tree Bark' color, but then add some 'Angel Blood' to the transition. We then accentuate the shadow areas with a 'Raven Black', from Badger, to define our darkest areas.
The remainder of the base colors are brush painted onto the models. Vallejo 'Gun Metal' for the silver, 'Bright Brass' mixed with 'Charred Brown', to create a copper color for the backpack and various weapon accents, Black for the hoses, 'Blood Red' for the gem, 'Parasite Brown' for the musket stock, and P3 'Elf Flesh' for the exposed skin.
Next we wash the model. 'Soft Shade' for the skin, Black for the silver areas, and 'Dark Shade' for the brass. We also used the soft shade on the Light model's robes to start defining our shadow areas. The clothing on the Dark model was left unwashed.
Now we define our highlight areas on the Dark model by adding 'Blood Red' to the raised area of clothing we want the eye to catch. Our typical green highlights were also added to the hoses, backpack and handheld halberd type weapon. The flesh tone on the model was highlighted using a mix (1/1) of 'Elf Flesh' and Vallejo 'Pale Flesh'.
Now I'm not entirely happy with these, especially the red one, but we're in a time crunch so they'll have to do. If I was taking more time I would have built up the reds on the Dark model to present more of a transition. I noticed that most of the subtle transitioning I did with the base colors was covered up by applying the highlights to the red, and what remains of the transitions aren't visible to the camera, though appear when looking at the model in hand. Something I'll stick in my memory bank for later jobs.
All in all it was much faster to paint the Light model, since the wash was applied for the shadows and that was that. The Dark model required more patience and ended with a less than desirable effect, at least in my opinion. Again, committing more time to the process would fix that, but we're forging forward and have a ton more painting to do.
This also brings up the answer to the question, 'Why do you try new things?' Well, the reason we all do I guess, to learn. It's really all just an exercise in refining technique anyway, so why not play a little to have some fun. We ended up with a decent looking model and we learned something to apply to our next attempts. Never be afraid to experiment, 'Simple Green' is cheep and will fix most your mistakes haha.
Until next time,
Casey.

Comments
Post a Comment
Please be respectful and no abusive language.